
Hi everyone,
Today I decided to do a tutorial for the Snowman Nails I created on Tuesday (you can see the post here).

Here are the polishes I used:

Here is the brush I used:

Now, on to the tutorial:

Paint your nails with a basecoat, and then apply your glitter polish.
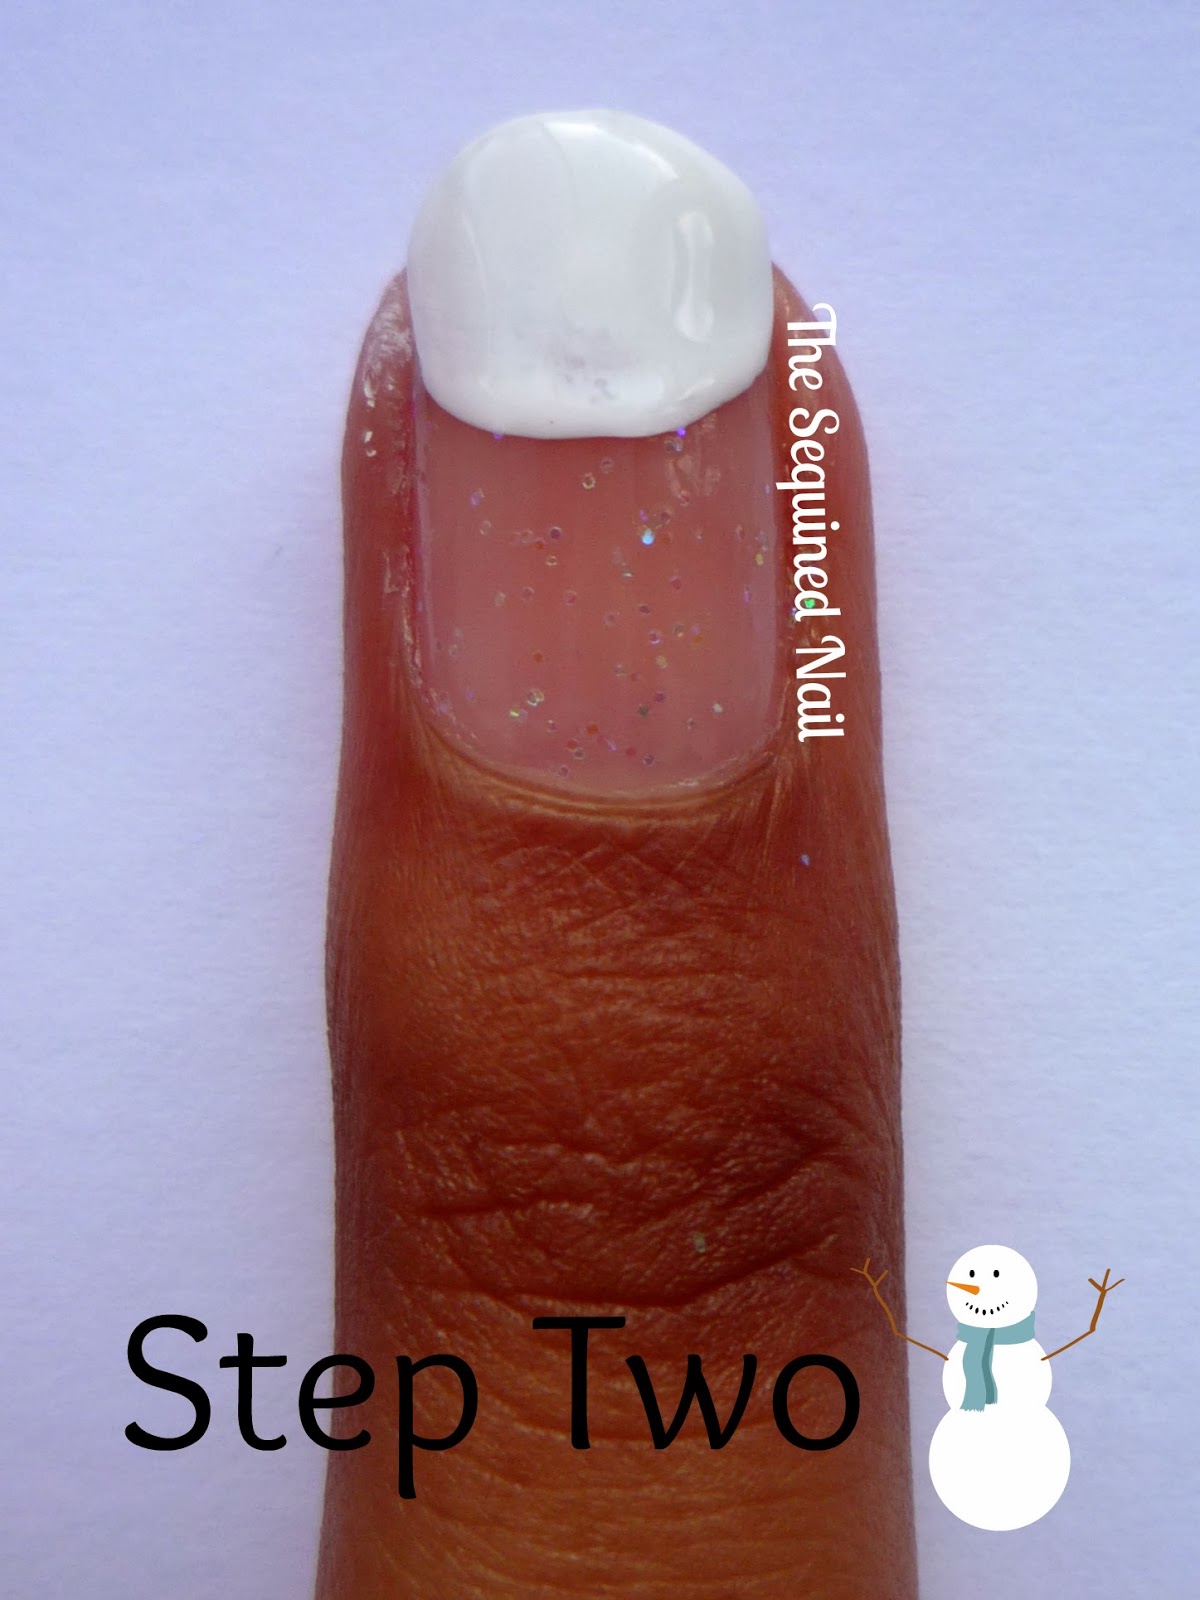
Next, use your white polish to create a semi - circle at the bottom of your nail.

Use your black striper to create the outline of the Snowman's hat.

Use your silver stripe to draw a line at the bottom of the hat.

Fill in your hat with black nail polish.

Use your Barry M Nail Art Pen to create the dots for the eyes and smile. Then, dip your nail art brush in orange polish and draw a nose.

Wait for your design to try and then add a topcoat. You can clean up your design after using a brush dipped in acetone or my personal preference, Barry M Nail Polish Corrector.
Here is a round up of all the steps:

Hopefully this tutorial was useful!
Let me know what you think.
To view the rest of my tutorials click here.
Please let me know if you try out this design - I can't wait to see you all try it!
Jayna
:)
Tumblr ~ Instagram ~ Bloglovin' ~ Facebook
To view the rest of my tutorials click here.
Please let me know if you try out this design - I can't wait to see you all try it!
Jayna
:)
Tumblr ~ Instagram ~ Bloglovin' ~ Facebook
Cute snowman and great tutorial too :)
ReplyDeleteThank you Lisa! :)
DeleteThis is so cute. I was thinking about doing snowman nails the other day lol.
ReplyDeleteHaha, thank you! :)
DeleteAwesome tutorial! ^_^
ReplyDeleteThank you Lizzy :)
Delete